最終更新日: 2025年1月29日

タイトル - PythonでPDFファイルを操作する

この記事では、Pythonを使用してPDFファイルを操作する方法をガイドします。ここでは、pypdfライブラリを使用します。

pypdfライブラリを使用して、Pythonで以下の操作を実行する方法を示します:

  • PDFからのテキスト抽出
  • PDFページの回転
  • 複数PDFの結合
  • PDFの分割
  • PDFページへの透かしの追加

注意: この記事は多くの貴重な詳細をカバーしているため、最も興味のあるセクションに自由に飛ぶことができます!内容は簡単にナビゲートできるように整理されており、あなたに最も関連する部分に素早く集中できます。

図解 - PythonでPDFファイルを操作する

サンプルコード

この記事で使用されているサンプルコードを以下のリンクからダウンロードできます。コード、入力ファイル、および出力ファイルが含まれています。

pypdfのインストール

pypdfをインストールするには、ターミナルまたはコマンドプロンプトで次のコマンドを実行してください:

pip install pypdf

注意: 上記のコマンドは大文字と小文字を区別します。

1. Pythonを使用してPDFファイルからテキストを抽出する

from pypdf import PdfReader
# Path to the PDF file
pdf_file = "pdf-to-extract-text/input.pdf"
# Create a PDF reader object
reader = PdfReader(pdf_file)
# Loop through the pages and extract text
for page_number, page in enumerate(reader.pages, start=1):
print(f"Page {page_number}:")
print(page.extract_text())
print("-" * 50) # Separator for readability

コードの説明

1. PDFリーダーオブジェクトの作成

reader = PdfReader(pdf_file)
  • PdfReader(pdf_file)はPDFファイルをリーダーオブジェクトにロードします。
  • このオブジェクトを使用すると、ページとそのコンテンツにアクセスできます。

2. ページのループ処理

for page_number, page in enumerate(reader.pages, start=1):
  • reader.pagesはPDFのページリストを返します。
  • enumerate(..., start=1)1から始まるページ番号を割り当てます。

3. 抽出されたテキストの表示

    print(f"Page {page_number}:")
    print(page.extract_text())
    print("-" * 50)  # 読みやすさのための区切り
  • page.extract_text()は現在のページからテキストコンテンツを抽出します。
  • スクリプトは抽出されたテキストとページ番号を表示します。
  • "-" * 50は読みやすさのための区切り線を印字します(--------------------------------------------------)。

コードで使用されている入力PDFファイル

コード実行結果

Page 1:
Python Tutorial
Release 3.7.0
Guido van Rossum
and the Python development team
September 02, 2018
Python Software Foundation
Email: docs@python.org
--------------------------------------------------
Page 2:
CONTENTS
1 Whetting Y our Appetite 3
2 Using the Python Interpreter 5
2.1 Invoking the Interpreter . . . . . . . . . . . . . . . . . . . . . . . . . . . . . . . . . . . . . . . 5
2.2 The Interpreter and Its Environment . . . . . . . . . . . . . . . . . . . . . . . . . . . . . . . 6
3 An Informal Introduction to Python 9
3.1 Using Python as a Calculator . . . . . . . . . . . . . . . . . . . . . . . . . . . . . . . . . . . . 9
3.2 First Steps Towards Programming . . . . . . . . . . . . . . . . . . . . . . . . . . . . . . . . . 16
4 More Control Flow T ools 19
4.1 if Statements . . . . . . . . . . . . . . . . . . . . . . . . . . . . . . . . . . . . . . . . . . . . 19
4.2 for Statements. . . . . . . . . . . . . . . . . . . . . . . . . . . . . . . . . . . . . . . . . . . . 19
4.3 The range() Function . . . . . . . . . . . . . . . . . . . . . . . . . . . . . . . . . . . . . . . 20
4.4 break and continue Statements, andelse Clauses on Loops. . . . . . . . . . . . . . . . . . 21
4.5 pass Statements . . . . . . . . . . . . . . . . . . . . . . . . . . . . . . . . . . . . . . . . . . . 22
4.6 Defining Functions . . . . . . . . . . . . . . . . . . . . . . . . . . . . . . . . . . . . . . . . . . 22
4.7 More on Defining Functions . . . . . . . . . . . . . . . . . . . . . . . . . . . . . . . . . . . . . 24
4.8 Intermezzo: Coding Style . . . . . . . . . . . . . . . . . . . . . . . . . . . . . . . . . . . . . . 29
5 Data Structures 31
5.1 More on Lists . . . . . . . . . . . . . . . . . . . . . . . . . . . . . . . . . . . . . . . . . . . . 31
5.2 The del statement . . . . . . . . . . . . . . . . . . . . . . . . . . . . . . . . . . . . . . . . . . 35
5.3 Tuples and Sequences . . . . . . . . . . . . . . . . . . . . . . . . . . . . . . . . . . . . . . . . 36
5.4 Sets . . . . . . . . . . . . . . . . . . . . . . . . . . . . . . . . . . . . . . . . . . . . . . . . . . 37
5.5 Dictionaries . . . . . . . . . . . . . . . . . . . . . . . . . . . . . . . . . . . . . . . . . . . . . . 38
5.6 Looping Techniques . . . . . . . . . . . . . . . . . . . . . . . . . . . . . . . . . . . . . . . . . 39
5.7 More on Conditions . . . . . . . . . . . . . . . . . . . . . . . . . . . . . . . . . . . . . . . . . 40
5.8 Comparing Sequences and Other Types . . . . . . . . . . . . . . . . . . . . . . . . . . . . . . 40
6 Modules 43
6.1 More on Modules . . . . . . . . . . . . . . . . . . . . . . . . . . . . . . . . . . . . . . . . . . 44
6.2 Standard Modules . . . . . . . . . . . . . . . . . . . . . . . . . . . . . . . . . . . . . . . . . . 46
6.3 The dir() Function . . . . . . . . . . . . . . . . . . . . . . . . . . . . . . . . . . . . . . . . . 47
6.4 Packages . . . . . . . . . . . . . . . . . . . . . . . . . . . . . . . . . . . . . . . . . . . . . . . 48
7 Input and Output 53
7.1 Fancier Output Formatting . . . . . . . . . . . . . . . . . . . . . . . . . . . . . . . . . . . . . 53
7.2 Reading and Writing Files . . . . . . . . . . . . . . . . . . . . . . . . . . . . . . . . . . . . . 57
8 Errors and Exceptions 61
i
--------------------------------------------------
Page 3:
Python Tutorial, Release 3.7.0
Python is an easy to learn, powerful programming language. It has efficient high-level data structures and
a simple but effective approach to object-oriented programming. Python’s elegant syntax and dynamic
typing, together with its interpreted nature, make it an ideal language for scripting and rapid application
development in many areas on most platforms.
The Python interpreter and the extensive standard library are freely available in source or binary form for all
major platforms from the Python Web site,https://www.python.org/, and may be freely distributed. The
same site also contains distributions of and pointers to many free third party Python modules, programs
and tools, and additional documentation.
The Python interpreter is easily extended with new functions and data types implemented in C or C++
(or other languages callable from C). Python is also suitable as an extension language for customizable
applications.
This tutorial introduces the reader informally to the basic concepts and features of the Python language
and system. It helps to have a Python interpreter handy for hands-on experience, but all examples are
self-contained, so the tutorial can be read off-line as well.
For a description of standard objects and modules, see library-index. reference-index gives a more formal
definition of the language. To write extensions in C or C++, read extending-index and c-api-index. There
are also several books covering Python in depth.
This tutorial does not attempt to be comprehensive and cover every single feature, or even every commonly
used feature. Instead, it introduces many of Python’s most noteworthy features, and will give you a good
idea of the language’s flavor and style. After reading it, you will be able to read and write Python modules
and programs, and you will be ready to learn more about the various Python library modules described in
library-index.
The
Glossary is also worth going through.
CONTENTS 1
--------------------------------------------------

2. Pythonを使用してPDFページを回転する

from pypdf import PdfReader, PdfWriter
# Input and output PDF files
input_pdf = "pdf-to-rotate/input.pdf"
output_pdf = "pdf-to-rotate/rotated_output.pdf"
# Read the PDF
reader = PdfReader(input_pdf)
writer = PdfWriter()
# Rotate the first page 90 degrees clockwise
page = reader.pages[0]
page.rotate(90) # Rotate 90 degrees clockwise
# Add the rotated page to the writer
writer.add_page(page)
# Add the rest of the pages without modification
for i in range(1, len(reader.pages)):
writer.add_page(reader.pages[i])
# Write the output to a new PDF file
with open(output_pdf, "wb") as file:
writer.write(file)
print(f"Rotated page saved to {output_pdf}")

コードの説明

このコードは、最初のページ90°時計回りに回転させ、他のページに影響を与えずに修正したPDFを保存します。

1. 必要なクラスのインポート

from pypdf import PdfReader, PdfWriter
  • PdfReader: 入力PDFを読み取ります。
  • PdfWriter: 修正を加えた新しいPDFを作成します。

2. 入力および出力ファイルパスの定義

input_pdf = "pdf-to-rotate/input.pdf"
output_pdf = "pdf-to-rotate/rotated_output.pdf"
  • スクリプトはinput.pdfから読み取り、修正済みファイルをrotated_output.pdfとして保存します。

3. PDFを読み取り、ライターオブジェクトを作成

reader = PdfReader(input_pdf)
writer = PdfWriter()
  • readerは既存のPDFをロードします。
  • writerは修正されたページを格納するために使用します。

4. 最初のページを90度回転

page = reader.pages[0]
page.rotate(90)  # 90度時計回りに回転
writer.add_page(page)
  • ページ1を抽出し、90度回転させ、新しいPDFに追加します。

5. 変更なしで残りのページを追加

for i in range(1, len(reader.pages)):
    writer.add_page(reader.pages[i])
  • 残りのページをループし、そのまま追加します。

6. 新しいPDFを保存

with open(output_pdf, "wb") as file:
    writer.write(file)
  • rotated_output.pdfをバイナリ書き込みモードで開き、新しいPDFを保存します。

7. 確認メッセージを印刷

print(f"Rotated page saved to {output_pdf}")
  • 成功メッセージを表示します。

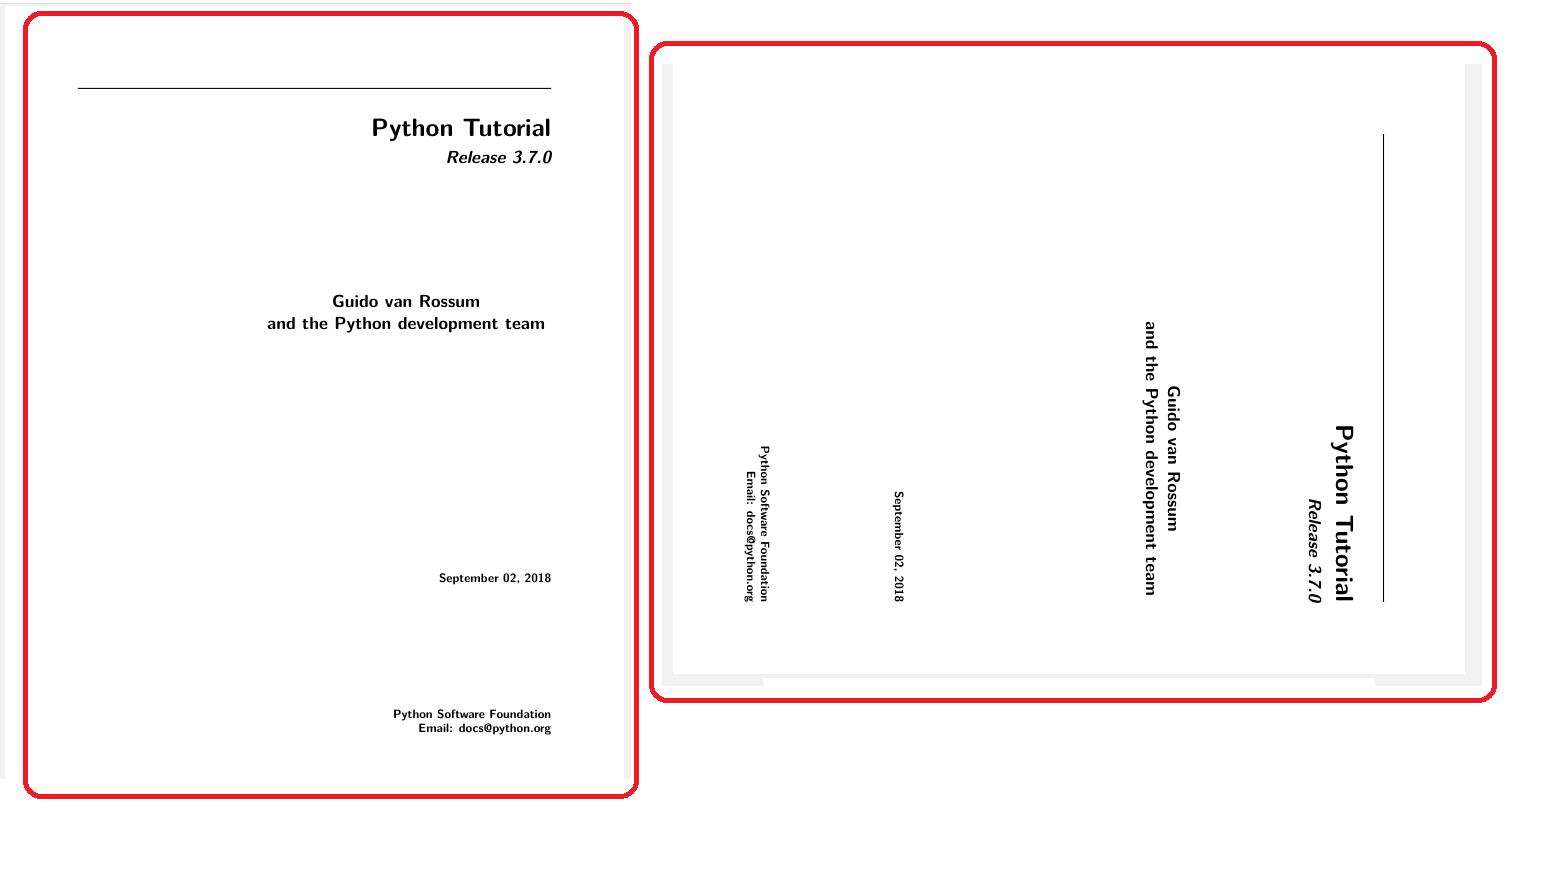
コードで使用された入力PDFとその回転出力

スクリーンショット Pythonで回転したPDFページのスクリーンショット

3. Pythonを使用してPDFファイルを結合する

このPythonスクリプトは、複数のPDFファイルをディレクトリから1つのPDFに結合する方法を示しています。PyPDFライブラリを使用します。

import os
from pypdf import PdfReader, PdfWriter
# Directory containing PDF files
directory = "pdfs-to-merge"
# Output file name
output_file = "output-dir/merged_output.pdf"
# Ensure the output directory exists
os.makedirs(os.path.join(directory, "output-dir"), exist_ok=True)
# Create a PdfWriter object
writer = PdfWriter()
# Iterate over all PDF files in the directory
for file_name in sorted(os.listdir(directory)):
if file_name.endswith(".pdf"):
file_path = os.path.join(directory, file_name)
print(f"Adding: {file_name}")
# Read the PDF file
reader = PdfReader(file_path)
# Append all pages to the writer
writer.append(reader)
# Write the merged PDF to an output file
output_path = os.path.join(directory, output_file)
with open(output_path, "wb") as output_pdf:
writer.write(output_pdf)
print(f"Merged PDF saved as: {output_path}")

コードの説明

  • このスクリプトは、指定されたディレクトリ(pdfs-to-merge)内のすべてのPDFファイルを、自動的に順番に1つの出力ファイル(merged_output.pdf)に結合します。
  • 出力ディレクトリが存在することを確認し、一覧の順序で各PDFのページを追加します。
  • 最終的にマージされたファイルをoutput-dirサブディレクトリに出力します。

コードの内訳

1. ライブラリのインポート

import os
from pypdf import PdfReader, PdfWriter
  • os: ファイルシステムと対話し、ディレクトリの読み取りやファイルパスの管理を行います。
  • PdfReader: PDFのコンテンツを読み取ります。
  • PdfWriter: 新しいPDFファイルを作成して書き込みます。

2. ディレクトリと出力ファイルの定義

directory = "pdfs-to-merge"
output_file = "output-dir/merged_output.pdf"
  • directory: PDFファイルが格納されているフォルダを指定します。
  • output_file: マージされたPDFの出力パスと名前を定義します。

3. 出力ディレクトリが存在しない場合は作成

os.makedirs(os.path.join(directory, "output-dir"), exist_ok=True)
  • 出力ディレクトリが存在することを確認し、存在しない場合は作成します。

4. PdfWriterオブジェクトの作成

writer = PdfWriter()
  • writerはすべてのPDFのページを収集し、結合するために使用します。

5. ディレクトリ内のすべてのPDFファイルを反復処理

for file_name in sorted(os.listdir(directory)):
    if file_name.endswith(".pdf"):
        file_path = os.path.join(directory, file_name)
        print(f"Adding: {file_name}")
  • このループは指定されたディレクトリ内のすべてのファイルを処理し、.pdf拡張子を持つファイルをチェックします。sorted()を使用してアルファベット順に処理します。

6. 各PDFを読み取り、ライターにページを追加

reader = PdfReader(file_path)
writer.append(reader)
  • 各PDFについて、PdfReaderはファイルを読み取り、そのPDFのすべてのページがwriterに追加されます。

7. マージされたPDFを出力ファイルに書き込む

output_path = os.path.join(directory, output_file)
with open(output_path, "wb") as output_pdf:
    writer.write(output_pdf)
  • すべてのページを収集した後、writer.write()はマージされたPDFを指定された出力パスに書き込みます。

8. 確認メッセージを印刷

print(f"Merged PDF saved as: {output_path}")
  • 保存されたマージされたPDFの位置を確認する成功メッセージを印刷します。

コードで使用した入力PDFファイルとマージされた出力PDF

4. Pythonを使用してPDFを分割する

from pypdf import PdfReader, PdfWriter
import os
# Input PDF file
input_pdf = "pdf-to-split/input.pdf"
# Output directory
output_directory = "pdf-to-split/output-dir"
# Ensure the output directory exists
os.makedirs(output_directory, exist_ok=True)
# Read the input PDF
reader = PdfReader(input_pdf)
# Loop through each page and save it as a separate PDF
for page_num, page in enumerate(reader.pages):
writer = PdfWriter()
writer.add_page(page)
# Define the output file name
output_file = os.path.join(output_directory, f"page_{page_num + 1}.pdf")
# Write the page to a new PDF
with open(output_file, "wb") as output_pdf:
writer.write(output_pdf)
print(f"Created: {output_file}")
print("PDF splitting complete!")

コードの説明

このPythonスクリプトは、PDFをページごとに分割し、PyPDFライブラリを使用して各ページを個別のPDFファイルとして保存します。最初に出力ディレクトリの存在を確認し、次に入力PDFファイルを読み取り、各ページをループ処理します。新しいPdfWriterオブジェクトを作成し、各ページを個別のPDFファイルとして保存します。出力ファイルは**output-dir**フォルダーに連番(例:page_1.pdf, page_2.pdf)で保存されます。最後に、各作成されたファイルの確認メッセージを印刷し、プロセスの完了を通知します。

コードで使用されている入力PDFと分割された出力ファイル

5. Pythonを使用してPDFに透かしを追加する

PyPDFライブラリを使用すると、透かしPDFを既存のPDFにオーバーレイすることでPDFに透かしを追加できます。透かしPDFが1ページのみであることを確認してください。それにより、メインPDFの各ページに正しく適用されます。

from pypdf import PdfReader, PdfWriter
# Paths for the input PDF and watermark PDF
input_pdf = "pdf-to-watermark/input.pdf"
watermark_pdf = "pdf-to-watermark/watermark.pdf"
output_pdf = "pdf-to-watermark/output_with_watermark.pdf"
# Read the input PDF and watermark PDF
reader = PdfReader(input_pdf)
watermark = PdfReader(watermark_pdf)
# Create a PdfWriter object for the output PDF
writer = PdfWriter()
# Ensure the watermark has only one page (it should be one-page PDF)
watermark_page = watermark.pages[0]
# Loop through each page in the input PDF
for page in reader.pages:
# Merge the watermark with the current page
page.merge_page(watermark_page)
# Add the merged page to the writer
writer.add_page(page)
# Write the output PDF with watermark
with open(output_pdf, "wb") as output_file:
writer.write(output_file)
print(f"Watermarked PDF saved as: {output_pdf}")

コードの説明

このPythonスクリプトは、入力PDFを読み取り、1ページの透かしPDFを抽出し、各ページに透かしをオーバーレイして、最終的な透かし入りPDFを保存します。

コードの内訳

こちらが各部分の簡単な説明です

1. 必要なクラスをインポート

from pypdf import PdfReader, PdfWriter
  • PdfReader は既存のPDFを読み取るために使用します。
  • PdfWriter は新しいPDFを作成して書き込むために使用します。

2. ファイルパスの定義

input_pdf = "pdf-to-watermark/input.pdf"
watermark_pdf = "pdf-to-watermark/watermark.pdf"
output_pdf = "pdf-to-watermark/output_with_watermark.pdf"
  • input_pdf: 透かしを追加する元のPDF。
  • watermark_pdf: 透かしとして使用する1ページの別個のPDF。
  • output_pdf: 透かし付きページを含む出力ファイル。

3. PDFの読み取り

reader = PdfReader(input_pdf)
watermark = PdfReader(watermark_pdf)
  • reader: 入力PDFを読み取ります。
  • watermark: 透かしPDFを読み取ります。

4. ライターオブジェクトの作成

writer = PdfWriter()
  • これは最終的な透かし入りPDFを作成するために使用します。

5. 透かしページの抽出

watermark_page = watermark.pages[0]
  • 透かしPDFが1ページのみであることを想定し、それをすべてのページにオーバーレイするために使用します。

6. 入力PDFページをループ処理し、透かしをマージ

for page in reader.pages:
    # 現在のページに透かしをマージ
    page.merge_page(watermark_page)
    
    # マージされたページを作成物に追加
    writer.add_page(page)
  • input_pdfの各ページを繰り返し処理します。
  • merge_page(watermark_page) は透かしを現在のページの上にオーバーレイします。
  • 修正されたページをwriterに追加します。

7. 透かし入りPDFを保存

with open(output_pdf, "wb") as output_file:
    writer.write(output_file)
  • 修正されたページを新しいPDFファイルに書き込みます。

8. 確認メッセージを印刷

print(f"Watermarked PDF saved as: {output_pdf}")
  • 出力ファイルパスを確認するメッセージを印刷します。

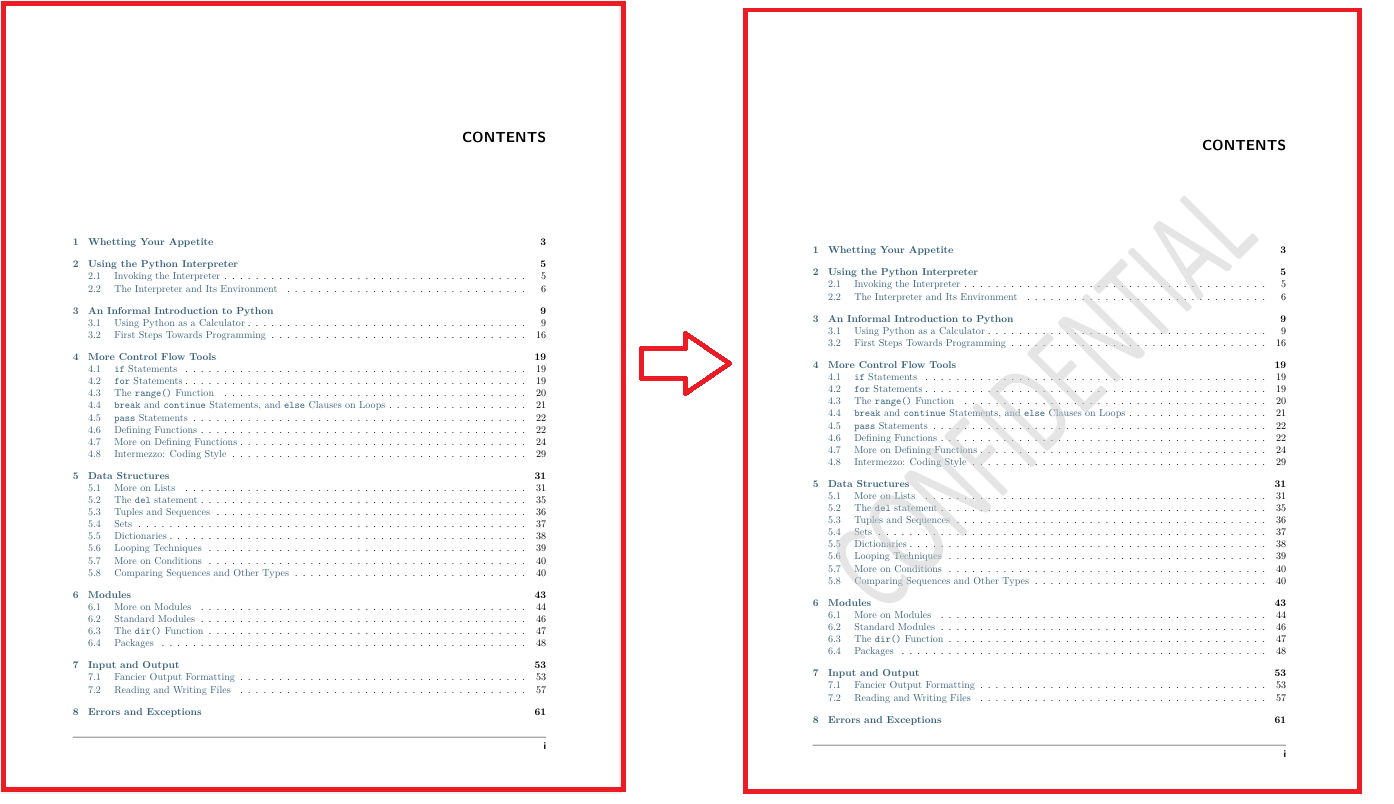
入力PDF、透かしPDF、および透かし入り出力PDF

スクリーンショット Pythonで透かしを追加したPDFのスクリーンショット

結論

このガイドでは、Pythonにおける重要なPDF操作、テキストの抽出、ページの回転、結合、分割、透かしの追加について探求しました。これらのスキルを用いて、自分自身のPDFマネージャーを構築し、さまざまなPDFタスクを効率的に自動化できます。