Last Updated: 29 Jan, 2025

In this article, we will guide you on how to work with PDF files using Python. For this, we’ll utilize the pypdf library.
Using the pypdf library, we’ll demonstrate how to perform the following operations in Python:
- Extracting text from PDFs
- Rotating PDF pages
- Merging multiple PDFs
- Splitting PDFs into separate files
- Adding watermarks to PDF pages
Note: This article covers a lot of valuable details, so feel free to skip to the sections that interest you the most! The content is organized for easy navigation, so you can quickly focus on what’s most relevant to you.

Sample Codes
You can download all the sample code used in this article from the following link. It includes the code, input files, and output files.
Install pypdf
To install pypdf, simply run the following command in your terminal or command prompt:
pip install pypdf
Note: The above command is case-sensitive.
1. Extracting Text from a PDF File Using Python
Code Explanation
1. Creating a PDF Reader Object
reader = PdfReader(pdf_file)
PdfReader(pdf_file)loads the PDF file into a reader object.- This object allows access to the pages and their content.
2. Looping Through Pages
for page_number, page in enumerate(reader.pages, start=1):
reader.pagesreturns a list of pages in the PDF.enumerate(..., start=1)assigns a page number starting from 1.
3. Printing Extracted Text
    print(f"Page {page_number}:")
    print(page.extract_text())
    print("-" * 50)  # Separator for readability
page.extract_text()extracts text content from the current page.- The script prints the extracted text along with the page number.
"-" * 50prints a separator line (--------------------------------------------------) for better readability.
Input PDF File Used in the Code
- Input File: Download Link
Output of the Code
2. Rotating PDF Pages Using Python
Code Explanation
The code basically rotates the first page by 90° clockwise and saves the modified PDF without affecting other pages.
1. Import Required Classes
from pypdf import PdfReader, PdfWriter
PdfReader: Reads the input PDF.PdfWriter: Creates a new PDF with modifications.
2. Define Input and Output File Paths
input_pdf = "pdf-to-rotate/input.pdf"
output_pdf = "pdf-to-rotate/rotated_output.pdf"
- The script reads from
input.pdfand saves the modified file asrotated_output.pdf.
3. Read the PDF and Create a Writer Object
reader = PdfReader(input_pdf)
writer = PdfWriter()
readerloads the existing PDF.writeris used to store the modified pages.
4. Rotate the First Page by 90 Degrees
page = reader.pages[0]
page.rotate(90)  # Rotate 90 degrees clockwise
writer.add_page(page)
- Extracts page 1, rotates it 90 degrees, and adds it to the new PDF.
5. Add Remaining Pages Without Changes
for i in range(1, len(reader.pages)):
    writer.add_page(reader.pages[i])
- Loops through the remaining pages and adds them as they are.
6. Save the New PDF
with open(output_pdf, "wb") as file:
    writer.write(file)
- Opens
rotated_output.pdfin write-binary mode and saves the new PDF.
7. Print Confirmation
print(f"Rotated page saved to {output_pdf}")
- Displays a success message.
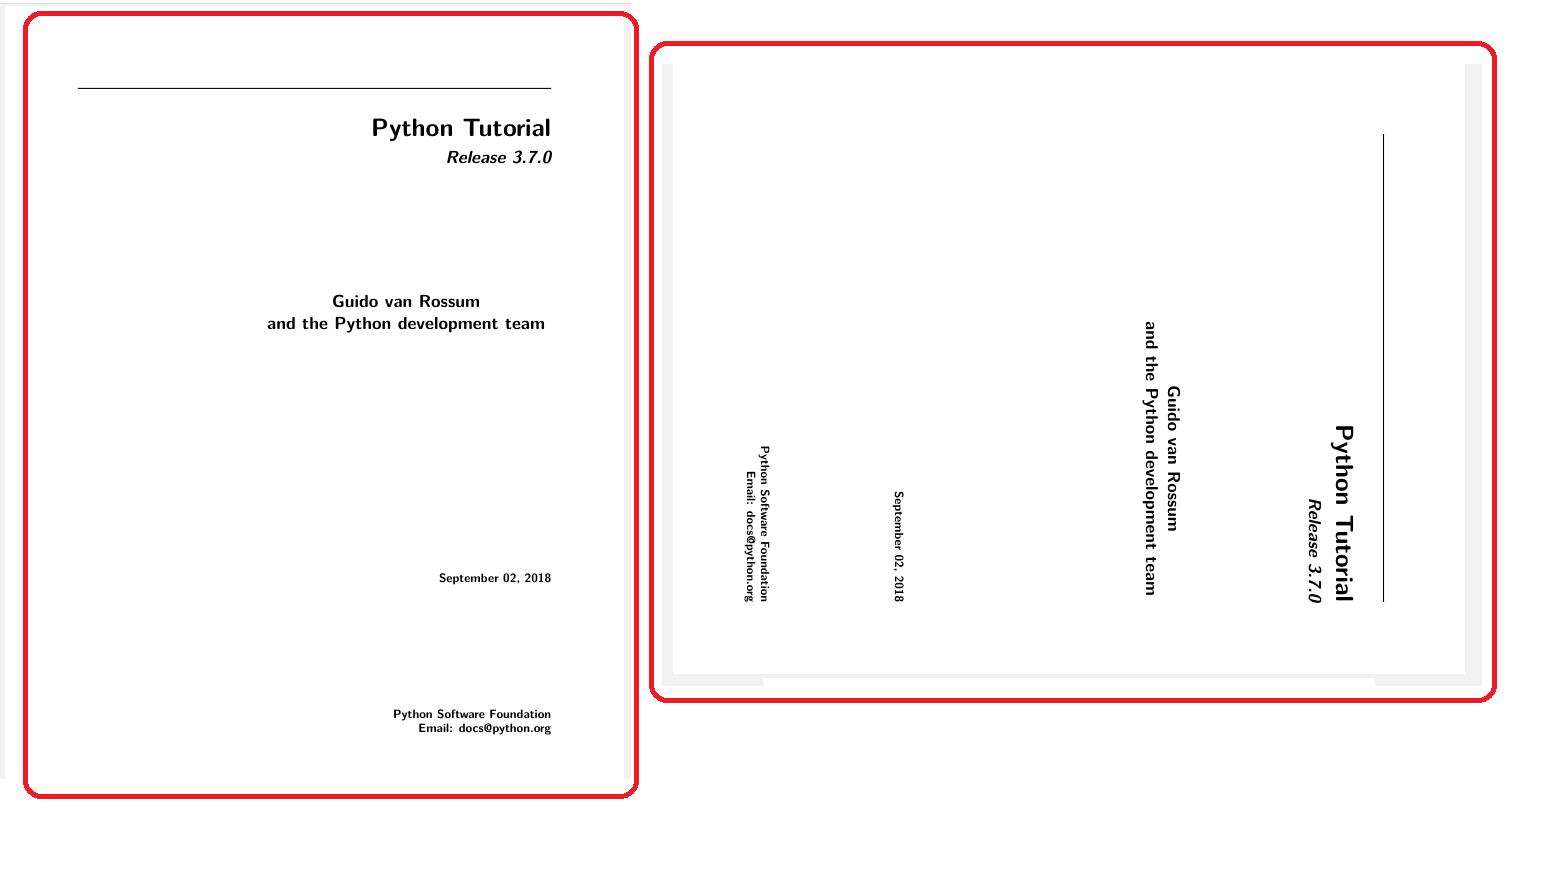
Input PDF Used in the Code and Its Rotated Output
- Input PDF File: Download Link
- Output Rotated PDF File: Download Link
Screenshot
3. Merging PDF Files Using Python
This Python script demonstrates how to merge multiple PDF files from a directory into a single PDF using the PyPDF library.
Code Explanation
- This script automatically merges all PDF files found in the specified directory (
pdfs-to-merge) into a single output file (merged_output.pdf). - It ensures the output directory exists and adds each PDF’s pages in the order they are listed.
- It outputs the final merged file in the
output-dirsubdirectory.
Code Breakdown
1. Import Libraries
import os
from pypdf import PdfReader, PdfWriter
os: Used to interact with the file system, such as reading directories and managing file paths.PdfReader: Reads the content of a PDF file.PdfWriter: Creates and writes a new PDF file.
2. Define Directory and Output File
directory = "pdfs-to-merge"
output_file = "output-dir/merged_output.pdf"
directory: Specifies the folder where the PDF files are stored.output_file: Defines the output path and name of the merged PDF.
3. Create Output Directory if It Doesn’t Exist
os.makedirs(os.path.join(directory, "output-dir"), exist_ok=True)
- This ensures the output directory exists, and if it doesn’t, it creates it.
4. Create a PdfWriter Object
writer = PdfWriter()
writeris used to collect and combine all the pages from the PDFs.
5. Iterate Over All PDF Files in the Directory
for file_name in sorted(os.listdir(directory)):
    if file_name.endswith(".pdf"):
        file_path = os.path.join(directory, file_name)
        print(f"Adding: {file_name}")
- This loop goes through all files in the specified directory, checking for files with the
.pdfextension. It usessorted()to process them in alphabetical order.
6. Read Each PDF and Append Pages to the Writer
reader = PdfReader(file_path)
writer.append(reader)
- For each PDF,
PdfReaderreads the file, and then all pages from that PDF are appended towriter.
7. Write the Merged PDF to an Output File
output_path = os.path.join(directory, output_file)
with open(output_path, "wb") as output_pdf:
    writer.write(output_pdf)
- After collecting all pages,
writer.write()writes the merged PDF to the specified output path.
8. Print Confirmation
print(f"Merged PDF saved as: {output_path}")
- Prints a success message confirming the location of the saved merged PDF.
Input PDF Files Used in the Code and the Merged Output PDF
- Input PDF Files: Download Link
- Merged Output PDF: Download Link
4. Splitting a PDF Using Python
Code Explanation
The above Python script splits a PDF into separate pages using the PyPDF library. It first ensures that the output directory exists, then reads the input PDF file. The script loops through each page, creates a new PdfWriter object, and saves each page as an individual PDF file. The output files are named sequentially (e.g., page_1.pdf, page_2.pdf) and stored in the output-dir folder. Finally, it prints a confirmation message for each created file and notifies when the process is complete.
Input PDF and Split Output Files
- Input PDF File: Download Link
- Split Output Files: Download Link
5. Adding a Watermark to a PDF Using Python
You can add a watermark to a PDF using the PyPDF library by overlaying a watermark PDF onto an existing PDF. Make sure the watermark PDF has only one page so it applies correctly to each page of the main PDF.
Code Explanation
The above Python script reads an input PDF, extracts a one-page watermark PDF, overlays the watermark on each page of the input PDF, and saves the final watermarked PDF.
Code Breakdown
Here’s a brief explanation of each part
1. Import Required Classes
from pypdf import PdfReader, PdfWriter
PdfReaderis used to read existing PDFs.PdfWriteris used to create and write a new PDF.
2. Define File Paths
input_pdf = "pdf-to-watermark/input.pdf"
watermark_pdf = "pdf-to-watermark/watermark.pdf"
output_pdf = "pdf-to-watermark/output_with_watermark.pdf"
input_pdf: The original PDF to which the watermark will be added.watermark_pdf: A separate one-page PDF that serves as the watermark.output_pdf: The output file that will contain the watermarked pages.
3. Read PDFs
reader = PdfReader(input_pdf)
watermark = PdfReader(watermark_pdf)
reader: Reads the input PDF.watermark: Reads the watermark PDF.
4. Create a Writer Object
writer = PdfWriter()
- This will be used to create the final watermarked PDF.
5. Extract Watermark Page
watermark_page = watermark.pages[0]
- Assumes that the watermark PDF has only one page, which is used to overlay on all pages.
6. Loop Through Input PDF Pages & Merge Watermark
for page in reader.pages:
    # Merge the watermark with the current page
    page.merge_page(watermark_page)

    # Add the merged page to the writer
    writer.add_page(page)
- Iterates through each page of
input_pdf. merge_page(watermark_page)overlays the watermark on top of the current page.- Adds the modified page to the
writer.
7. Save the Watermarked PDF
with open(output_pdf, "wb") as output_file:
    writer.write(output_file)
- Writes the modified pages into a new PDF file.
8. Print Confirmation
print(f"Watermarked PDF saved as: {output_pdf}")
- Prints the output file path for confirmation.
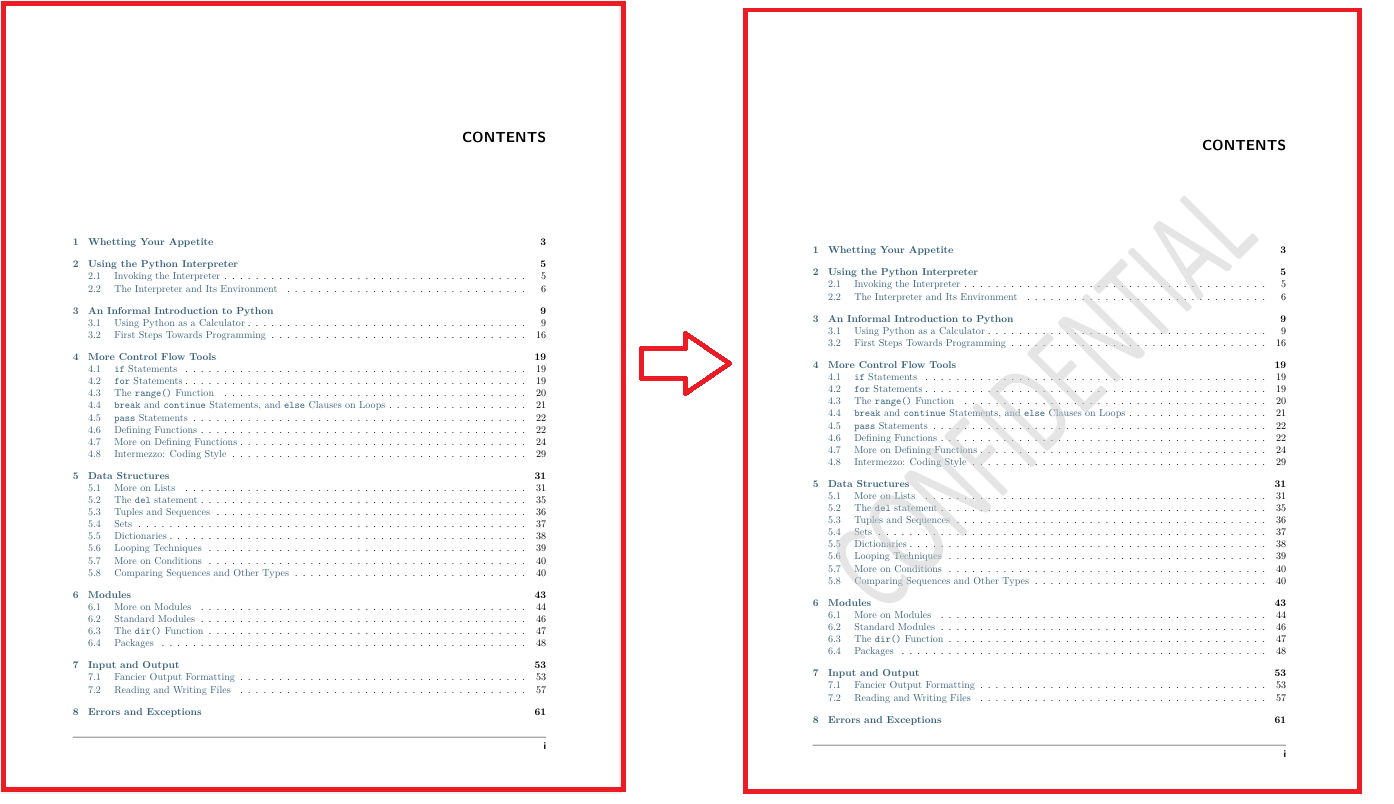
Input PDF, Watermark PDF, and Output Watermarked PDF
- Input PDF File: Download Link
- Watermark PDF File: Download Link
- Output Watermarked PDF File: Download Link
Screenshot
Conclusion
In this guide, we explored essential PDF operations in Python, including extracting text, rotating pages, merging, splitting, and adding watermarks. With these skills, you can now build your own PDF manager and automate various PDF tasks efficiently.